Sunday, October 11, 2009

Coke Purse for my sis for Christmas

This was my little project for the week end. Most of my family will get gifts i make for Christmas so i thought i would share this one. My sis collects coke stuff so i think she will like this.

Well having no pattern i got out my favorite thing to use (Reynolds freezer paper) and started drawing till i got one i liked. Here it is so feel free to make yours.

Step1 I cut out the front (coke) and back (black) then some Fusible Fleece. Two for front two for the back. Pressed as the directions say.
Step 2 Then place right sides together and sew together. I used a regular stitch around the outside edge then turned it right side out: pressed again. ( DO NOT SEW THE OPENING ON THE HANDLE) That's the cut out hole.
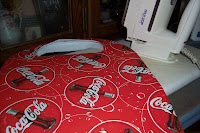
Step 3 Handle part is next. Around the handle i used a zig-zag. Anyway this makes it thick and strong.

Step 4 I wanted inside pockets so i cut out squares 2 Coke & 2 Red. Sew one Coke to one one Red; turn and press. (i just measured the with of the purse and cut my squares about 2 inches smaller). Step 5 On the inside of one side of the purse i places one and stitched it in place making sure it was in the middle and touching the bottom. Repeat the for the next side. (Please note no Fusible Fleece)


Step 6 Measure the sides from the handle hole to the bottom add 1 inch. Cut your fabric for the two outside sides. Make with the size you want Sew with 1/2 inch seam. (mine is 5 inches). Turn and press again no fleece. (Don't forget to leave an opening to turn it)

Step 6&7 are the hardest because of the thickness..... Place the sides on then the bottom sewing slow slow. Did i say slow. I broke two needles. LOL
Yes i used pin's. Do the bottom the same way.
Mine is done and i sure can make improvements if i make another one. But for now i just hope my sis likes it.
Many thanks. Hope you like. Please feel free to leave comment.

Friday, October 9, 2009

Dora Quilt for Christmas


The last couple of days i have been working on Christmas gifts for family members. I work on theses in between customers quilts. I have a new niece she is almost a year old. Well i decided to use up my scrapes from other quilt projects. So yes i did another Dora Ragged Quilt so i will not explain the making of it. I have already done so on my blog. I also put in a few I Spy's that were left overs too. On the back of this quilt i made rows of one color then alternated with another color. " Gota love left overs". Hope you enjoy the pictures.
Please feel free to leave a comment. Thanks

Sunday, October 4, 2009

I Spy Ragged Quilt

Today i am trying to catch up with my blog. I made 2 of these twin ragged I Spy quilts. My hubby came home from work and asked me to make them for 2 little girls. After hubby told me there story i told him yes. Anyway i made both of these before i made Dear and Tootsie's quilt but i kinda got ahead of myself on posting to my blog.
This is the first one it has Dora/Tweety/Princess/ and other cartoon's squares in it. This quilt was made for the youngest girl.

The second quilt was made the same without the cartoon squares because she is a little older. I think they share the same room so i wanted them to look the same but yet different.
these are done except i have to do the clipping then wash them to start the rag effect.
I will try to explain how i made them so here goes:

First i cut out the squares for the top/batting/and backing all the same size.

Then the sewing started. 1 top square laid onto the batting and backing. Since the squares were small i quilted them together with an X through the layers of each square. Just make sure the top is facing you and the back is away from you.

Next is a little harder to explain. You take 2 quilted squares and have the back side of each square facing each other: you will be looking at the right ride (top) You will sew the 2 squares together from the top side so that the seam is on the top side of your square. 1/2 inch seam. Now when you open this up the back will be finished and the top will have the seam showing. Thats when you know you did it right. You did good. This is what it should look like.

Its a little confusing at first but if you pay attention it becomes a habit. I sewed squares together to make a row across then placed them on the bed so i could see if i liked it that way. I continued to do the rows till it was ready to connect the rows together the opposite way.

After all your rows have been sewed together i sewed all around the outside of the quilt 1/2 inch from the edge to give it strength.The last 2 things to do is clip all layers in between each square about a 1/2 apart but do NOT clip through the stitching. Then last but not least wash and dry to start the ragging effect. Oh Yea clip the outer edge the same way. No Binding unless you want to ad one.
This is what the back on mine looks like.
I hope you enjoyed.